Welcome to the Tour
This tour of the Ceylon language is primarily intended for developers with some experience in object-oriented programming. It assumes basic familiarity with concepts like static typing, inheritance, subtyping, and type parameterization (generics). If you already know a language like Java, C#, or C++, you already have all the background you need.
What if I don't know Java?
If you're new to object-oriented programming, you'll still be able to learn Ceylon. These concepts aren't difficult to pick up! But you might find some chapters of the tour pretty hard going first time through. If so, take it slowly: experiment with the language using Ceylon IDE for Eclipse or for IntelliJ, and gradually get a feel for how these things work and how they are useful. None of us learned to program from books or tutorials or from other people telling us how to do it. We learned by playing and experimenting and working with other people's code.
If you're completely new to static typing, you'll probably find Ceylon very fussy and even a bit complicated at first. There's a lot more rules to know about than in a language like Python, Ruby, or Smalltalk. But we promise that the benefits make it worthwhile in the end, especially once you learn to use the IDE effectively. Tools for a dynamic language simply can't reason about your code like Ceylon IDE can!
Help us improve!
If you find some part of this tour difficult to read or difficult to understand, or if you think one of the examples sucks, or if you think a section is missing some useful information, please let us know.
Before you start
If you're using the command line distribution to try out Ceylon for the first time, we highly recommend you start by compiling and running the samples included in the distribution.
Instructions for getting started are contained in the file
README.md in the root directory of the distribution, or
right here in GitHub.
Now, let's just make sure we can compile and run our own program from the command line and IDE.
A really simple program
Here's a classic example program:
shared void hello() {
    print("Hello, World!");
}
This code declares a function named hello() that prints
Hello, World! on the console.
We call this function a toplevel function because it's not a member of a type. So we don't need a receiving object to invoke a toplevel function. Instead, we can just call it like this:
hello();
Or, since this toplevel function is annotated shared, we can
run it directly from the command line or IDE.
Gotcha!
Note that Ceylon doesn't (yet) support scripting. You can't
write statements like print("Hello, World!"); outside of a
function or class, like you would in a scripting language.
This is not, on its own, a legal program:
print("Hello, World!"); //error: must occur inside a function or class
Running the program from the command line
Let's try it out. Save the above code in the file
./source/hello.ceylon and then run the following command:
ceylon-1.3.3/bin/ceylon run --compile=force --run=hello default
where ceylon-1.3.3 is the path to your Ceylon install directory.
You should see the message Hello, World!. You will find the
compiled module archive default.car in the directory
./modules/default.
Note that:
- The option
--compile=forcespecifies that the program should be compiled before execution. - The option
--run hellospecifies the name, in this case,hello, of the function that should be executed. If this option is missing, the function name defaults torun. - The parameter
defaultspecifies the module that should be executed, in this case, the "default" module, that is, the module you have if you don't have a module.
Alternatively, you can compile and run in two separate steps, with the following commands:
ceylon-1.3.3/bin/ceylon compile
ceylon-1.3.3/bin/ceylon run --run=hello default
If you need to, you can explicitly specify the source file you wish to compile:
ceylon-1.3.3/bin/ceylon compile source/hello.ceylon
Or, alternatively, the name of the module you wish to compile:
ceylon-1.3.3/bin/ceylon compile default
Getting help
A very useful trick is:
ceylon-1.3.3/bin/ceylon help compile
Or:
ceylon-1.3.3/bin/ceylon help run
The command ceylon help outputs usage information about
any of the ceylon subcommands.
If you're still having trouble getting started with the command line tools, try compiling and running the samples if you haven't already.
Selecting the JDK
Ceylon requires Java 7 or Java 8, so you might need to verify that you're using a supported version of Java.
bash$ java -version
java version "1.8.0_92"
Java(TM) SE Runtime Environment (build 1.8.0_92-b14)
Java HotSpot(TM) 64-Bit Server VM (build 25.92-b14, mixed mode)
bash$ javac -version
javac 1.8.0_92
If you're using some other version of Java, you'll need to change to use Java 7 or Java 8:
- on Linux, use
update-java-alternatives, - on Mac, use the
System Preferencesapplet, or - on Windows, set the
JAVA_HOMEenvironment variable.
Setting the character encoding
If you see the following error, or similar, when compiling a Ceylon program:
unmappable character for encoding ASCII
Then you have a source file whose character encoding doesn't match the default character encoding for your OS. You'll need to explicitly specify the character encoding on the command line like this:
ceylon compile --encoding=UTF-8
Running the program using plain Java
If you want to run the program using the java command, instead
of using ceylon run, you can use the ceylon fat-jar command to
package your program as a Java .jar archive:
ceylon-1.3.3/bin/ceylon fat-jar --run=hello default
This will create a file named default.jar in the working directory,
which you can run using java:
java -jar default.jar
This is very useful if you ever need to run a Ceylon program in
an environment where Ceylon itself is not installed. The "fat"
.jar file contains everything needed to run the Ceylon program,
including its dependencies.
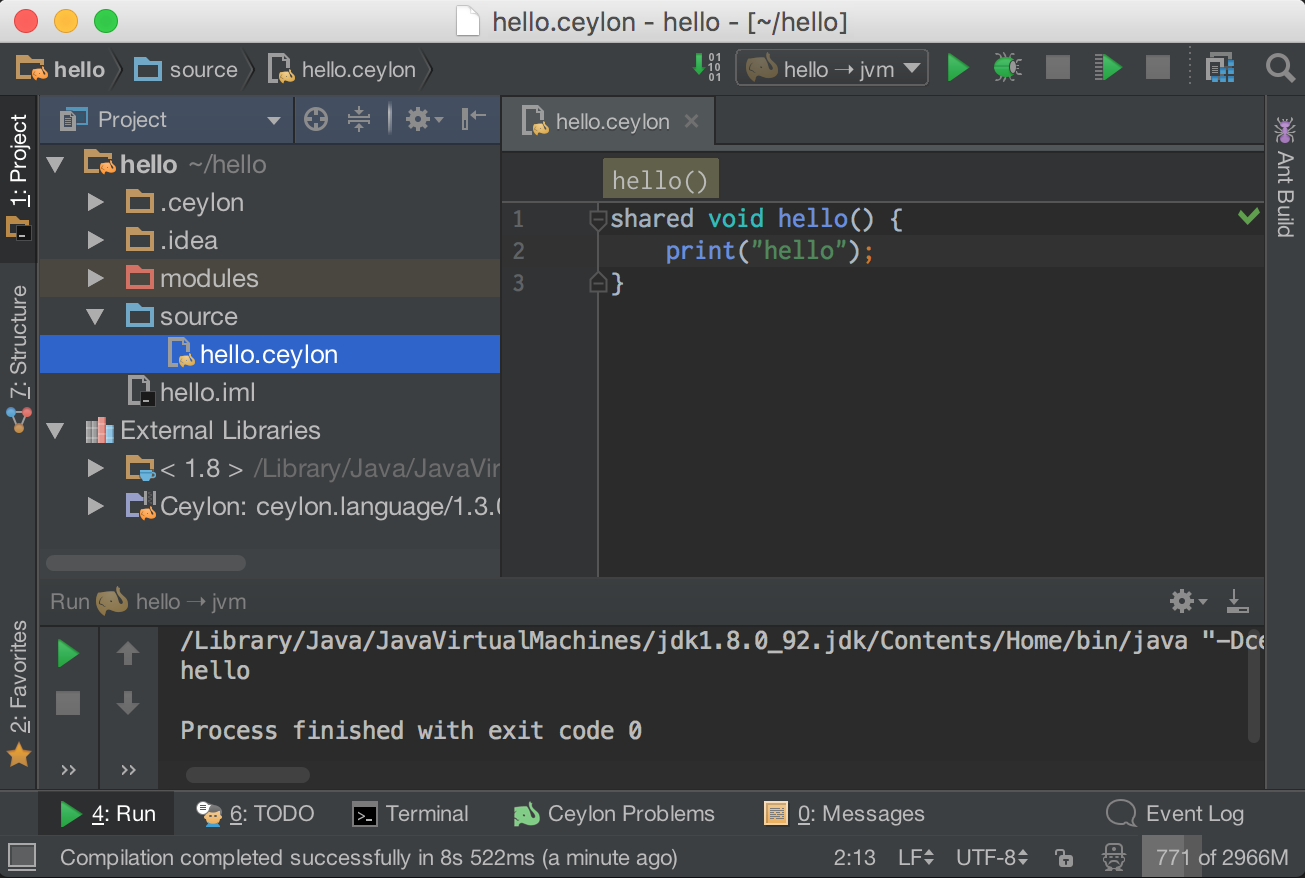
Running the program from the IntelliJ IDE
To run the program in Ceylon IDE for IntelliJ:
- Create a new project using
File > New > Project..., selectingCeylon, clickingNextthree times, entering a name for the project, and finally clickingFinish. - Create a new
.ceylonfile inside the project by selecting the project'ssourcefolder, and usingFile > New > Ceylon File/Declaration. - Paste the definition of
hello()into this new file. - Finally, select the file and run it using
Run > Run....
This executes the program on the JVM.
If you have node.js installed, you can go to File > Project Structure...,
select the Facets section, select Ceylon, enable Compile project to JavaScript,
then click OK, and run the program on node using Run > Run....
If you want to be sure which VM you're executing on, just add this line to your program:
print(runtime.name);
If it prints jvm, you're running on Java. If it prints node.js,
you're running on node.
Selecting the JDK
You need to make sure that your project is configured to compile
using the Java 7 or Java 8 compiler. Go to File > Project Structure...,
select the Project section, and make sure that the project is
configured to use the Java 7 or Java 8 SDK.
Setting the character encoding
To set the source file character encoding in IntelliJ, go to
File > File > Encoding and select a File Encoding.
Running the program from the Eclipse IDE
To run the program in Ceylon IDE for Eclipse, go to the Ceylon perspective, then:
- Create a new project using
File > New > Ceylon Project. - Create a new
.ceylonfile inside the project usingFile > New > Ceylon Source File. - Paste the definition of
hello()into this new file. - Select the file and run it using
Run > Run As > Ceylon Application.
This executes the program on the JVM.
If you have node.js installed, you can go to Project > Properties,
select the Ceylon section, enable Compile project to JavaScript,
then click OK, and run the program using
Run > Run As > Ceylon JavaScript Application.
Selecting the JDK
Ceylon IDE for Eclipse requires Java 7 or Java 8, so you might
need to verify that Eclipse is running on a Java 7 or Java 8 VM.
Go to Eclipse > About Eclipse, click Installation Details, and go
to the Configuration tab. You'll see the Java version listed
among the other system properties. See the
instructions above to change the version
of Java. You might need to edit eclipse.ini.
You need to make sure that your project is configured to compile
using the Java 7 or Java 8 compiler. Go to Project > Properties,
select the Java Compiler section, and make sure that the project
is configured to use the Java 7 or Java 8 compiler.
Setting the character encoding
To set the source file character encoding in Eclipse, go to
Project > Properties, select the Resource section, and select
a Text file encoding, for example, UTF-8.
Continue the tour
We'll begin with the Basics.
