Blog tagged android

Ceylon on Android

In my last post, I explained how you can use Ceylon in Apache Cordova to write applications for every mobile platform, including iOS and Android. This time, with many apologies for writing it late (“next week” turned into next month), I will explain how to use the Ceylon IntelliJ plugin to write native Android applications in Ceylon in Android Studio.

Getting started with Ceylon on Android Studio

To start writing Ceylon applications in Android Studio, follow these steps:

  • Download Android Studio
  • Start it
  • Create a new application by clicking on Start a new Android Studio Project
  • You can use these values for Application name: CeylonDemo
  • And for Company domain: android.example.com
  • Next, select an Empty activity, with Activity Name: MainActivity
  • Click Finish and wait for the project to be created

At this point you have an Android project open, but we still haven't had time to install the Ceylon plugin, so let's do this right now:

  • Click on File > Settings > Plugins > Browse Repositories
  • Then on Manage Repositories > +
  • Add this repository: https://downloads.ceylon-lang.org/ide/intellij/development/updatePlugins.xml
  • Now click on Install Ceylon IDE

You will likely need to restart Android Studio, so do that.

Next we're going to convert our Android project to a Ceylon Android project:

  • In the Android view, Right-click on app > Configure Ceylon in this Module
  • Click OK on the resulting configuration dialog

This will set up the Ceylon plugin, and will add most of what you need in your Gradle build to build Ceylon Android applications. You now have your Ceylon sources in app/src/main/ceylon and it includes a module descriptor and an empty activity:

At the moment, this requires a Ceylon 1.2.3 distribution to build, and since it's not released yet you're going to have to either build one yourself (just the Getting the source part), or download a nightly build. Once you have it, edit app/build.gradle near then end to add ceylon > ceylonLocation and make it point to where you installed your distribution (it needs to point to the Ceylon binary, not just the distribution root):

ceylon {
    // ...
    ceylonLocation ".../ceylon/dist/dist/bin/ceylon"
}

Make sure you click on Sync now to sync your Gradle build.

Now, there's a bug we're in the process of fixing which fails to detect the exact version of the Android SDK tooling and modules, and so depending on which version of the Android Tools you're using you may have to sync the imports of com.android.support:appcompat-v7:23.1.1 in app/build.gradle (in dependencies) and in the Ceylon module descriptor in module.ceylon. Make sure the Ceylon import version is the same as the Gradle import version, because the Gradle build is what makes it available to Ceylon, due to Android's peculiarities.

In order to finish the conversion, make sure you delete the Java activity (since we're going to keep the Ceylon one), in Project Files, delete app/src/main/java.

Due to another pending plugin fix, you may have to click on Tools > Ceylon > Reset Ceylon Model at this point so that the Ceylon plugin gets synchronised with all these past changes (don't worry we're fixing this at the moment).

The good news is we're already able to click on Run app and try this in the emulator, but we're going to make it a little more interesting.

Customising your Ceylon Android activity

We're going to be displaying a list of Ceylon modules published on Ceylon Herd, so we will make use of the Ceylon SDK, and in particular you will have to edit module.ceylon to add the following imports:

import ceylon.http.client "1.2.3";
import ceylon.uri "1.2.3";
import ceylon.json "1.2.3";
import ceylon.collection "1.2.3";
import ceylon.interop.java "1.2.3";

Next, we're going to turn our MainActivity into a ListActivity and run an asynchronous task to connect to the Herd REST endpoint, so edit MainActivity.ceylon with this:

import android.os { Bundle, AsyncTask }
import android.app { ListActivity }
import android.widget { ArrayAdapter, ListAdapter }
import android.support.v7.app { AppCompatActivity }
import ceylon.interop.java { createJavaStringArray }
import java.lang { JString = String }
import android { AndroidR = R }
import ceylon.language.meta { modules }
import ceylon.uri { parseUri = parse }
import ceylon.http.client { httpGet = get }
import ceylon.json { parseJson = parse, JsonObject = Object, JsonArray = Array }
import ceylon.collection { MutableList, LinkedList }

shared class MainActivity() extends ListActivity() {

    class LoadModules() extends AsyncTask<String, Nothing, List<String>>() {
        shared actual List<String> doInBackground(String?* uris){
            assert(exists uri = uris.first);
            value response = httpGet(parseUri(uri)).execute();
            value modules = LinkedList<String>();
            assert(is JsonObject json = parseJson(response.contents),
                    is JsonArray results = json["results"]);
            // Iterate modules
            for(res in results) {
                assert (is JsonObject res); // Get the list of versions
                assert (is String name = res["module"],
                        is JsonArray versions = res["versions"]);
                modules.add(name);
                print(name);
            }
            return modules;
        }
        shared actual void onPostExecute(List<String> result){
            print("Got result: ``result``");

            ListAdapter adapter = ArrayAdapter<JString>(outer, AndroidR.Layout.simple_list_item_1,
                createJavaStringArray(result));
            listAdapter = adapter;
        }
    }

    shared actual void onCreate(Bundle savedInstanceState) {
        super.onCreate(savedInstanceState);
        setContentView(R.Layout.activity_main);

        LoadModules().execute("https://modules.ceylon-lang.org/api/1/complete-modules?module=ceylon.");
    }
}

Now edit app/src/main/res/layout/activity_main.xml to change the activity type to a list activity:

<ListView
    android:layout_width="match_parent"
    android:layout_height="match_parent"
    android:id="@android:id/list"/>

And lastly request the network permission for your app, since we're hitting a web service, by adding this to app/src/main/res/AndroidManifest.xml:

<uses-permission android:name="android.permission.INTERNET"/>

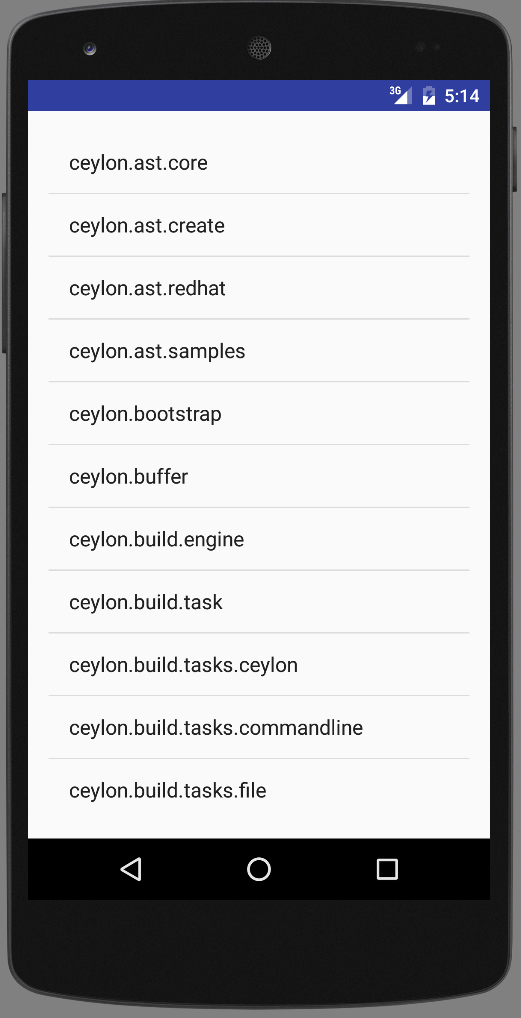
That's all you need, now just click on Run > Run app and watch your Ceylon application display the list of modules in the emulator:

Some technical info

The Ceylon IntelliJ plugin has not been released yet, but a preview is forthcoming really soon. You will see it's already quite advanced when you try this out. Don't hesitate to report any bugs, or better yet, contribute fixes :)

Most of it works well enough for Android, except the caveats noted above, and the fact that Android Studio does not yet recognize Ceylon classes, so they will be marked as errors in the .xml files that refer to them, and when you run your application it will report an error:

Could not identify launch activity: Default Activity not found. Error while Launching activity

It only means it could not start your application, you will have to click on it to start it in the emulator. But the deployment worked. We're fixing this at the moment, so it will only improve.

If you want to revert to the Ceylon Eclipse IDE to edit your Ceylon Android application, you can, it will work once you have your project set up with Android Studio. It's much easier to use it to set it up so all the Gradle config is just right. Once that is done, you can use Eclipse if you want, and use $ ./gradlew assembleDebug to build your APK.

This work depends on changes we've made in Ceylon 1.2.3 (to be released soon) which adds support for jars which provide alternate smaller JDKs (such as the Android jar), improvements in modularity so that the created applications depend on much fewer runtime Ceylon jars than before, fixes in the runtime metamodel to support Android runtimes, and several other tweaks. I will probably write an account of all that in a future blog entry.

This work also depends on the Ceylon Gradle plugin written by Renato Athaydes, and on a new Ceylon Gradle Android plugin which adds support for Ceylon in Android applications. This plugin is by no means finished, and in particular does not yet support incremental compilation (even though the Ceylon IDE and compiler do). It also does not yet support the latest Android Instant Run feature. Again, please report issues or better, contribute pull-requests :)

Ceylon on mobile devices

Ceylon already runs on the JVM, whether bare-bones, via JBoss Modules, Vert.x, Java EE Servlet containers such as WildFly, or OSGi containers, as well as on JavaScript VMs such as Node.js and the browser. But today we're going to explain how to run Ceylon on mobile devices, not just in the browser (though it does play a part in it), but as applications, via Apache Cordova.

Apache Cordova allows you to write applications for every mobile platform, including Android and iOS, using nothing but HTML, CSS and JavaScript. Since Ceylon compiles to JavaScript this is perfect as it allows us to run our Ceylon applications on iOS, via the JavaScript compiler backend.

Note that this article is using Ceylon 1.2.3 which is not yet released, because the JavaScript runtime in Cordova on Android had one peculiarity we had to work around in the language module JavaScript implementation. Luckily you can get nightly builds of Ceylon 1.2.3 and the Ceylon 1.2.3 SDK.

Writing your Ceylon Cordova application

Installing Apache Cordova

First, install Apache Cordova and add two platforms. I haven't been able to test the iOS platform since it requires an OSX platform to build and an iOS device to test, and I lack both, so I will explain how to package for Android and the browser, and let you guys try it out for iOS, but I have enough faith in Apache Cordova that it will Just Work™.

# Install npm, the Node.js package manager
$ sudo apt-get install npm
# Then install Apache Cordova
$ npm install cordova

Small note: for me this installed things in ./node_modules/cordova and the Apache Cordova command in ./node_modules/cordova/bin/cordova, so adapt your path as you must.

# Create your application
$ cordova create ceylon-cordova-demo
$ cd ceylon-cordova-demo
# Now add the browser and Android platforms
$ cordova platform add browser
$ cordova platform add android

At this point you have your application ready to be checked in your browser:

$ cordova platform run browser

Or in an Android emulator, provided you have downloaded the Android SDK already:

$ ANDROID_HOME=.../Android/Sdk cordova platform build android
$ ANDROID_HOME=.../Android/Sdk cordova platform run android

Getting a little side-tracked about styling

Writing an application using just HTML and CSS means you have to make some effort for it to look good, and instead I decided to delegate to use Polymer so that my application would have the look and feel of Android Material Design applications to feel even more like a native application on Android. No doubt a similar look and feel exists for iOS.

So let's download Polymer in our application's HTML sources:

$ npm install bower
$ cd www
$ bower init
# At this point just hit enter/Yes/No until it's set up 
$ bower install --save Polymer/polymer
$ bower install --save Polymerelements/paper-item

And now edit www/index.html to use Polymer:

<script src="bower_components/webcomponentsjs/webcomponents.js"></script>
<link rel="import" href="bower_components/paper-item/paper-item.html">
<link rel="import" href="bower_components/paper-item/paper-item-body.html">

You should also remove the default CSS:

<link rel="stylesheet" type="text/css" href="css/index.css">

Getting require.js and jQuery

Ceylon compiles to JavaScript modules by way of require.js, so we're going to have to download it too:

$ cd www/js
$ wget http://requirejs.org/docs/release/2.2.0/minified/require.js

Our Ceylon demo will use jQuery to add elements to the HTML page, so we also need it:

$ cd www
$ bower install --save jquery

Now edit www/index.html to use both:

<script type="text/javascript" src="js/require.js"></script>
<script src="bower_components/jquery/dist/jquery.js"></script>

Writing the Ceylon application

We're going to write a trivial application that queries Ceylon Herd for the list of modules, to display them in a list.

Let's start by creating a Ceylon module in source/cordova/demo/module.ceylon:

module cordova.demo "1.0.0" {
    import ceylon.json "1.2.3";
}

And our application's main method in source/cordova/demo/run.ceylon:

import ceylon.json { parseJson = parse, JsonObject = Object, JsonArray = Array }

shared void run() {
    dynamic {
        // The HTML element where we'll add our items
        dynamic target = jQuery("#target");
        // The function called when we get data from the server
        void success(dynamic data){
            // Parse the JSON
            assert(is JsonObject json = parseJson(data),
                   is JsonArray results = json["results"]);
            // Iterate modules
            for(res in results){
              assert(is JsonObject res);
              // Get the list of versions
              assert(is String name = res["module"],
                     is JsonArray versions = res["versions"]);
              // Join them
              value versionText = ", ".join(versions.narrow<String>());
              // Now add the HTML items
              dynamic item = jQuery("<paper-item/>");
              dynamic body = jQuery("<paper-item-body two-line/>").appendTo(item);
              jQuery("<div/>").text(name).appendTo(body);
              jQuery("<div secondary/>").text(versionText).appendTo(body);
              target.append(item);
            }
        }
        // Query Herd for the list of modules
        jQuery.get("https://modules.ceylon-lang.org/api/1/complete-modules?module=ceylon.", null, success, "text");
    }
}

Now, obviously using jQuery to add HTML is far from ideal, so I can't wait for someone to extend ceylon.html to allow Polymer web components!

We can now compile our application for JavaScript:

$ ceylon compile-js

And copy our compiled module and all its dependencies to where the Apache Cordova application will find them in www/modules:

$ ceylon copy --with-dependencies --js --out www/modules cordova.demo/1.0.0

Invoking the Ceylon module from the Cordova application

Because we're going to use require.js inline and connect to Ceylon Herd, we have to adjust the Apache Cordova permissions in www/index.html, so find that line and edit it as such:

<meta http-equiv="Content-Security-Policy" 
      content="default-src 'self' 'unsafe-inline' 
               https://fonts.googleapis.com
               https://fonts.gstatic.com;
               connect-src *">

We're left with just invoking our Ceylon function in www/index.html:

<script type="text/javascript">
  // tell require.js where our Ceylon modules are 
  require.config({
    baseUrl:'modules',
  });
  // when the document is ready
  jQuery(function(){
    // load our Ceylon module
    require(['cordova/demo/1.0.0/cordova.demo-1.0.0'], function(client) {
      // and call our run method
      client.run();
    });
});
</script>

And setting up the target HTML elements where we're going to add every loaded module (in the same file):

<body id="app" unresolved>
  <app-shell class="fit">
    <div id="target" role="listbox"></div>
  </app-shell>
</body>

Trying it

And that's it, try it out in your browser:

$ cordova platform run browser

Or in an Android emulator:

$ ANDROID_HOME=.../Android/Sdk cordova platform build android
$ ANDROID_HOME=.../Android/Sdk cordova platform run android

If you have OSX and iOS dev tools, please try this with the iOS Cordova platform and let me know how it works :)

In the future, we would benefit from having a type-safe API in front of the Cordova JavaScript API that lets you access native mobile APIs such as the camera, GPS, contacts, but even without it you can already use them using dynamic blocks.

And now for the teaser… this is only one method to run Ceylon on Android, because obviously it may be more desirable to use the JVM compiler backend and integrate with the Android Tools to run Ceylon on Android using only type-safe APIs. Don't worry, it's coming, and next week I will show you how :)